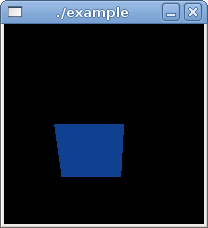
The following example demonstrates the use of a timeline to rotate a rectangle around the x axis while changing its color:
Source Code
File: main.py
import sys

import clutter


rotation_angle = 0
color_change_count = 0


def on_timeline_new_frame(timeline, frame_num, rect):
    global rotation_angle
    rotation_angle += 1
    if rotation_angle >= 360:
        rotation_angle = 0

    # Rotate the rectangle clockwise around the z axis, around it's
    # top-left corner
    rect.set_rotation(clutter.X_AXIS, rotation_angle, 0, 0, 0)

    # Change the color
    # (This is a silly example, making the rectangle flash)
    global color_change_count
    color_change_count += 1
    if color_change_count > 100:
        color_change_count = 0
    if color_change_count == 0:
        rect_color = clutter.Color(255, 255, 255, 153)
        rect.set_color(rect_color)
    elif color_change_count == 50:
        rect_color = clutter.Color(16, 64, 144, 255)
        rect.set_color(rect_color)


def on_timeline_marker_reached(timeline, marker_name, frame_num):
    print "Reached marker %s at frame %d." % (marker_name, frame_num)


def main():
    stage_color = clutter.Color(0, 0, 0, 255)
    rect_color = clutter.Color(255, 255, 255, 153)

    # Get the stage and set its size and color
    stage = clutter.Stage()
    stage.set_size(200, 200)
    stage.set_color(stage_color)

    # Add a rectangle to the stage
    rect = clutter.Rectangle(rect_color)
    rect.set_size(70, 70)
    rect.set_position(50, 100)
    stage.add(rect)
    rect.show()

    # Show the stage
    stage.connect('destroy', clutter.main_quit)
    stage.show()

    timeline = clutter.Timeline(5000) # milliseconds
    timeline.add_marker_at_time("clutter-tutorial", 2000) # milliseconds
    timeline.connect('new-frame', on_timeline_new_frame, rect)
    timeline.connect('marker-reached', on_timeline_marker_reached)

    timeline.set_loop(True)

    timeline.start();

    # Start the main loop, so we can respond to events
    clutter.main()

    return 0


if __name__ == '__main__':
    sys.exit(main())